Challenge 3 - Deploy a reCAPTCHA Token and Challenge Page
< Previous Challenge - Home - Next Challenge>
Introduction
reCAPTCHA Enterprise for WAF and Google Cloud Armor integration offers the following features: reCAPTCHA challenge page, reCAPTCHA action-tokens, and reCAPTCHA session-tokens. In this code lab, we will be implementing the reCATCHA session token site key and reCAPTCHA WAF challenge-page site.
Description
Create reCAPTCHA session token and WAF challenge-page site key
The reCAPTCHA JavaScript sets a reCAPTCHA session-token as a cookie on the end-user’s browser after the assessment. The end-user’s browser attaches the cookie and refreshes the cookie as long as the reCAPTCHA JavaScript remains active.
NOTE: Before beginning make sure you’ve enabled the reCAPTCHA Enterprise API as specified in Challenge 0.
- Use gcloud to create the reCAPTCHA session token site key and enable the WAF feature for the key.
- You must set the WAF service to Cloud Armor to enable the Cloud Armor integration.
- Key type is session-token
- Use the score integration type. Other options are checkbox and invisible.
- Use a testing score of
0.5.- This will validate that the bot management policies we create with Cloud Armor are working as intended. Replicating bot traffic is not easy and hence, this is a good way to test the feature.
- Make note of the output of your gcloud command, it will output the key that you’ll need later in this hack.
- Use gcloud to create the reCAPTCHA WAF challenge-page site key and enable the WAF feature for the key. You can use the reCAPTCHA challenge page feature to redirect incoming requests to reCAPTCHA Enterprise to determine whether each request is potentially fraudulent or legitimate. We will later associate this key with the Cloud Armor security policy to enable the manual challenge. We will refer to this key as CHALLENGE-PAGE-KEY in the later steps.
- You must set the WAF service to Cloud Armor to enable the Cloud Armor integration.
- Key type is challenge-page
- Use the invisible integration type.
- Make note of the output of your gcloud command, it will output the key that you’ll need later in this hack.
- Navigate to the reCAPTCHA Enterprise screen in the Google Cloud Console. Go to the KEYS tab and confirm that both of the keys you created are there.
Implement reCAPTCHA session token site key
-
In the console, locate the VM in your instance group and SSH to it.
-
Go to the nginx webserver root directory and sudo to root.
- Edit
index.htmland embed the reCAPTCHA session token site key.- NOTE: The session token site key is added to the
HEADsection of the HTML page. -
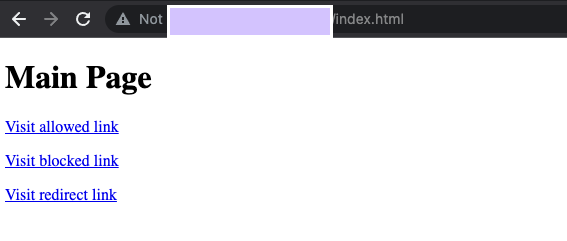
Change
index.htmlto have 3 links on it pointing to pages we will create next:Link Text Link href Visit allowed /good-score.htmlVisit blocked /bad-score.htmlVisit redirected /median-score.html
- NOTE: The session token site key is added to the
- Create three other HTML pages to test out the bot management policies and scores. Name them:
- good-score.html
- bad-score.html
- median-score.html
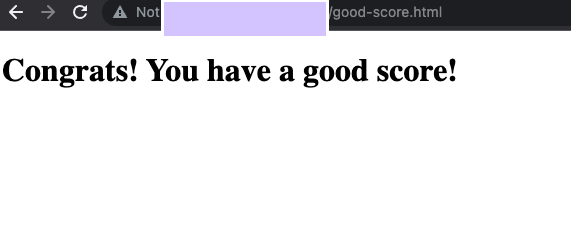
NOTE: These pages only need to contain some title text to tell you which score it is for, like so:
- Validate that you are able to access all the webpages by opening them in your browser.
-
Open
http://{LoadBalance_IP_Here}/index.html. You will be able to verify that the reCAPTCHA implementation is working when you see “protected by reCAPTCHA” at the bottom right corner of the page: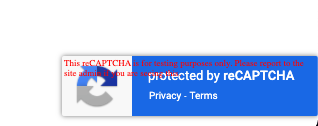
-
Click into each of the links:
-
Validate that you see the correct behaviour for each page:
good-score.html: You see the page perfectly.bad-score.html: You are blocked from the page.median-score.html: You are challenged with a puzzle.
-
Success Criteria
- You’ve enabled the reCAPTCHA API
- You’ve created a Cloud Armor WAF enabled reCAPTCHA session token key with integration type score
- You’ve created a Cloud Armor WAF enabled reCAPTCHA challenge page key with integration type invisible
- Your webserver’s landing page is updated to include the reCAPTCHA session token site key and 3 links and shows the “protected by reCAPTCHA” image.
- You can validate access to each page.